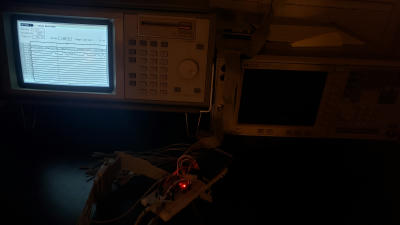
I purchased an old logic analyzer at Dayton Hamvention a few months ago for $40 USD. Unfortunately, it didn't come with a boot disk, essentially making it a paperweight. I've finally booted it up and now want to document the procedure that it took to create the boot disk.
Preface
There are two ROM versions; v1.xx and v2.xx. If you turn on your 1651B without a boot disk, it will show your ROM version in the top right. I happen to be on version 2.06. This is important as they each have their own boot disk, and to my knowledge they aren't compatible with each other.
Hardware Setup
The 1651B needs a 720KB boot disk formatted to some proprietary HP format. I only have 1.44MB floppies, so I had to do a bit of trickery. I installed two floppy drives in one machine, and told the bios the B: drive was a 3.5" 720KB drive. Then, on one of my floppies, I taped over one of the holes in its body. This would make it show up as a 720KB disk. There are two holes on most floppies; one indicates the density and the other toggles if it's read only or not. Generally, the latter hole will have a plastic slider.
Aside from this you will need additional floppies. You'll also need a Linux machine with a 1.44MB 3.5" floppy drive. I ran Debian but you should be able to adapt my instructions for most distros.
Software Setup
Start by downloading software onto your Linux machine. You'll need your boot disk software, available here. If that link dies in the future, feel free to email me and I can send you my copy. Note that this is only for the 2.xx ROM. The 1.xx boot disk should be out there somewhere but I am not sure where.
You'll also need FreeDOS, available here. Download the Floppy Edition.
Pop in your first floppy disk. Copy over FreeDOS:
dd if=144m/x86BOOT.img of=/dev/fd0
Once that finishes, remove your first floppy. Next, we'll need to copy the HP boot disk creation utility onto a second disk, so pop it into the drive.
  sudo apt install dosfstools

  sudo mkfs.msdos /dev/fd0

  sudo mount /dev/fd0 /mnt

  sudo cp "1650_51B_V2.11 OS SYS/*" /mnt/
And again, once that finishes, take out the disk.
Getting into DOS
Head over to your retro machine, as described in the Hardware Setup section. Put your FreeDOS floppy into the A: drive and turn on the power. I found that FreeDOS boots a fair bit slower than I remember MS-DOS 6.22 took. Anyway, eventually you should be prompted to select a language. Once you do that, it'll drop you into the installer. You can cancel this - we don't need to install anything to disk.
The first thing I recommend doing is a simple dir. I've had problems swapping the disk without doing this - seems like FreeDOS doesn't load everything in until after this.
Remove your FreeDOS floppy and put in your second floppy. Also put your 720KB disk in the B: drive. Start up LIFUTIL.exe by typing lifutil.
First, we need to initialize the disk. Choose "LIF Initialize" at the bottom. Use the "F" keys to change options. F1/F2 will allow you to cycle through settings. The full list of keys is at the bottom of the screen. Use the following settings:
Drive name: B:
Disk type: 3-1/2" Double Sided
Sector size: 1024 bytes
Interleave: 1
Directory Size: 144 Files
Volume Label: A165X (probably doesn't matter)
Press F5 twice. Wait for the format to complete - it'll take a minute or two. Then press F8 to get back to the main menu.
Copying the Files
Once your disk is initialized, it's just a matter of copying the files over. We need to copy the following files:
SYSTEM_
PVTEST_
DRAMTEST
MIXEDDEM.O
STATEDEM.O
I copied them in that order. The first two files are system files; I'm not sure if they have to be first. Technically the other three files aren't needed - they're just configs you can choose to load.
System Files
Assuming you're still in LIFUTIL, choose "DOS to LIF Copy" from the main menu. Most options you can keep the same.
Make sure to update the file name to "SYSTEM_".
Change the LIF drive name to B:, if it's not already set to that.
For the file conversion, choose "No format change, user-def type"
Press F6 and enter the following:
User-defined LIF file type: C001
Implementation specific field: 534F544F
Press F5 to start the copy. It may take a few minutes.
Once it's finished, be sure to repeat for "PVTEST_".
Config Files (Optional)
Config files are similar.
Update the file name to DRAMTEST.
Go to file conversion and press F6. Enter the following:
User-defined LIF file type: C120
Implementation specific field: 534F544F (same as for system files)
Press F5 to start the copy.
Once it's finished, repeat for MIXEDDEM.O and STATEDEM.O.
First Boot
At this point you're ready to boot. Pop the floppy out of your B: drive and put it in your logic analyzer. Power it up and it should start up!
Make sure to clone your disk immediately. It'd definitely good to have a backup disk (don't want to go through all of that again, of course). I've heard the cloned floppy boots faster, but I can't reproduce this on my machine.
Press I/O
Scroll to "Disk Operations" and press "Select"
Scroll to "Load" and press "Select"
Scroll to "Duplicate Disk" and press "Select"
Follow the on-screen instructions
And that's it! Enjoy your logic analyzer; I hope this guide helped!

